How I built my first website with React
- 11 min read
- React
- Next.js
- ChakraUI
- JavaScript
3 years ago
Hello. In this post I'll explain how I built my personal website using React. Prior to this, I had very little experience with fullstack development, my only two projects at the time being my Sorting Visualizer and Anonboard. My previous blog was a static website made using Jekyll and hosted on Github Pages. What I didn't like about that website is that it was not very customizable. I had a lot of ideas in mind and Jekyll was limiting in many ways. It was super easy to get started with though, and I recommend Jekyll if you want to start your own blog without much effort.
And with that, I said goodbye to that website and I started building my own. One problem though- I didn't know how.
The Stack
ReactJS
React was on my to-learn list for a long time. I had analysis-paralysis of choosing which project to do and I finally said fuck it, and started learning. I only used two resources, one, the official React website , specifically, the Tic Tac Toe tutorial , and two, the online course called fullstackopen offered by The University of Helsinki. I highly recommend both of these. Once finishing upto Part 2 on fullstackopen, I finished the Tic Tac Toe tutorial and felt I learnt enough to begin implementing.
Next.js and MDX
I had 0 zero idea about how a blog is implemented, so I did what every proper person in this field does, and I used Google. I came across this post by Josh Comeau , and the tech stack he used for his own blog seemed perfect for a few reasons:
- Next.js has static site generation capabilities, which means that for content that doesn't change (i.e. a blog post), the page could be served up blazingly fast.
- Next.js has server side rendering capabilities as well. This was particularly important for me, since I wanted to host my projects on the same website, and they could not be implemented without server side rendering. (If you're curious, two projects I've currently hosted are built using p5.js , which is a JavaScript library for creating visualizations, and requires the
window()object to be available, and thewindow()object wouldn't be available if the page was statically generated). - Next.js has a super easy way to implement routes, much better than Express in my opinion.
- Next.js is a React framework, and React is what I wanted to learn.
- With MDX , I can make new blog posts super quick, and I could also migrate all my posts from my old website without too many modifications (the previous website was built using Jekyll, which hosts blog posts written in Markdown ).
- Also, with MDX, I'm not limited to the components rendered from Markdown, I can make whatever custom React component I want and stick it in the middle of my blog page. For instance, here's my custom
<RainbowTitleText />component:
It's Wednesday my dudes
99% of the text on this page is from a Markdown file. Pretty sick huh?
ChakraUI
My only experience with a front-end framework before this was Bootstrap . I heard so much about TailwindCSS , but as a beginner, I felt it was a bit of a hassle to get started with. My next alternatives were between ChakraUI and Mantine . While I could not decide between the two, I decided that I'm spending too much brain energy on a frivolous decision, and what mattered more was actually getting started. So I went with ChakraUI. And I have no regrets. One very cool feature that I absolutely love about ChakraUI is how easy it is to implement site-wide dark/light mode. I can toggle the mode by clicking on the icon in the top right corner of the page. Actually, to show how cool MDX is, lemme plop up the button right here. Go on, click it.
Boom.
This button is the same component as the one on the top right of the page. All I had to do was import it in. This is one very important reason why many people use React- it's super easy to re-use components. All the code I had to write for this button was the following:
Anyway, let's get started.
1 - Landing Page
I'm a big fan of cool-looking landing pages, and I'm super proud of how mine turned out. But first things first though, I will give credit where credit is due. The animated ocean waves and clouds aren't mine, I found them on CodePen . While I could've done all this on my own, I absolutely abhor CSS, and I'd rather not learn it just for this.
- Ocean Waves - CodePen by Ted McDonald.
- Clouds - CodePen by Mark Bowley
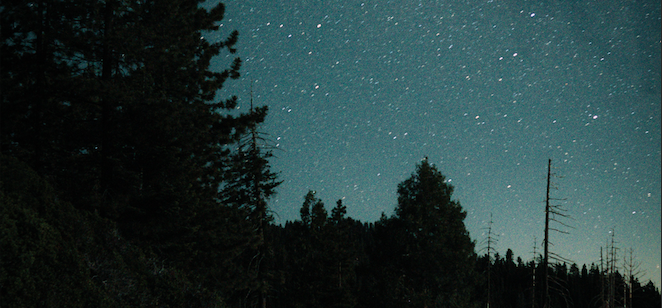
The stars are done using an NPM package called react-tsparticles . (Toggle dark mode on the root page to see the stars). The sun and moon are just a simple amalgamation of some React and some CSS.
2 - Blog Page
One thing I didn't want in this page was for the blog posts to be displayed like how they'd be displayed in a traditional blog- title followed by a short summary followed by a date. Meh. Too boring. I wanted to spice it up. I'm a big fan of Masonry layouts , and I wanted to somehow implement that here. So I decided to have each post rendered as a component that looks like a card, and I think it turned out pretty good. If you're on desktop, take a look for yourself at /blog . (Or view the desktop version of the site if you're on mobile.) The masonry part of it is handled by the Plock library.
Here's how a Card component looks like. The arbitary data inside the card below is passed in through the props object.
An Example Card Component
CategoryThis is a card component that I made for my blog page.
- 5 minutes
- Tag 1
- Tag 2
- Tag 3
3 years ago
Filtering & Sorting Posts
This part is surprisingly pretty simple. As of the date of writing this post, there are two ways of filtering posts: 1) Search query, 2) Filtering by tag/category. All you have to do to filter posts with multiple criteria is to chain on multiple filter() commands. I added a useState() hook to both the search bar and the sort dropdown, and to filter the posts with these multiple criteria, all I have to do is this:
If you're wondering why there's so many toLowerCase() calls, it's because I wanted to preserve the original casing of the tags and categories (which may consist of multiple words). To make sure that all posts show up when no search query or tag or category is specified, look at the first condition in each filter() function- it checks to see whether the filter exists in the first place. If it doesn't, no data is filtered, i.e. all data is returned.
3 - Blog Post Page
This is the part where MDX comes into play. First of all, what is MDX?
MDX allows you to use JSX in your markdown content. You can import components, such as interactive charts or alerts, and embed them within your content. This makes writing long-form content with components a blast. Source
What MDX allows us to do is modify the HTML that is returned. This is super powerful, because it allows me to customize to my heart's content. The NPM packages that I used is called next-mdx-remote.
I use Next.js's Dynamic Routes in order to have a custom slug for each blog post. The following is the content within the [slug].jsx file:
The MDXComponents component is where I specify the styles for all the HTML elements that Markdown returns. The code below contains a mix of custom components and ChakraUI's components and has extra props removed for easy reading. Referring to this should be enough to get you started on your own implementation. Notice that each key inside the MDXComponents object is returning a React functional component- you can use this to return whatever you like.
Final Thoughts
Aaaaand, that's it. Pretty short yes, I did not want to write too much about it. The basics are there. You should be able to replicate the functionality of this website if you wanted to with the content in this post. Overall, this took me about 1 month to finish, with an average of 1-3 hours worked on it each day. Could've been better I suppose, but I wasn't giving it my full attention, and since I'm new to Next.js, a lot of time was spent on some annoying hydration issues. In Next.js, you cannot nest a <p> tag inside another <p> tag. This is a limitation of the framework. Blasphemous, I know. Couple this with the fact that ChakraUI renders a <p> tag for a lot of its components, I had a super-fun (read: awful) time debugging everything.
Was it worth it? Hell yeah. Next.js is blazing fast. And I can fire up a new website so much more quicker now. Truly, the fastest way to learn something is to do your own project. I'm glad I stuck with this, because another version of myself would be stuck ideating on what the perfect next project would be and never would have started. Just take a leap of faith I guess.
From the stars,
FR.